Events
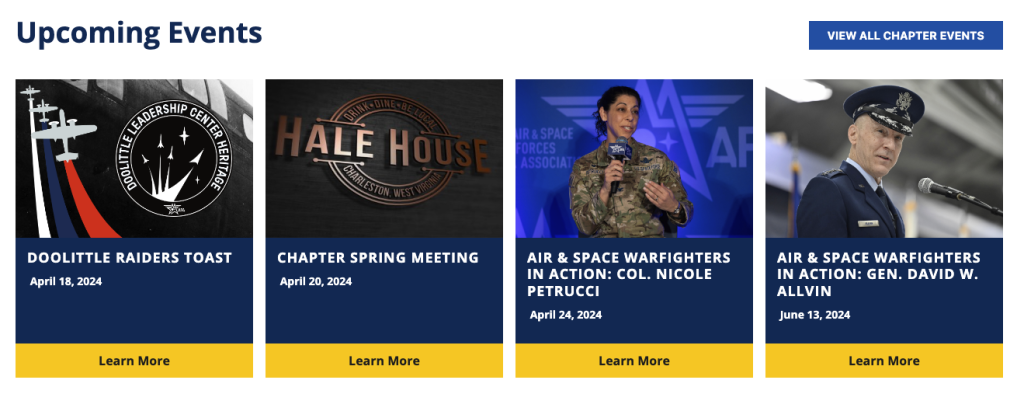
The AFA Events plugin was created specifically to manage events on both the national AFA website, as well as the chapter sites, and integrate those events in both contexts. The next four upcoming national and local events are displayed on the home page of every participating chapter website. These events are displayed chronologically, with the most imminent events displayed first. The homepage calendar also displays a button that links directly to the chapter’s own calendar of local events. The local events calendar is also reachable from the website’s main menu.
When you select Events from the sidebar you will see a list of the current Events your chapter has on the calendar, both upcoming and past events.
To create a new Event, Click the Add New Event button at the top of the screen. You can also edit an Event by clicking on the Event title.
Adding New Events
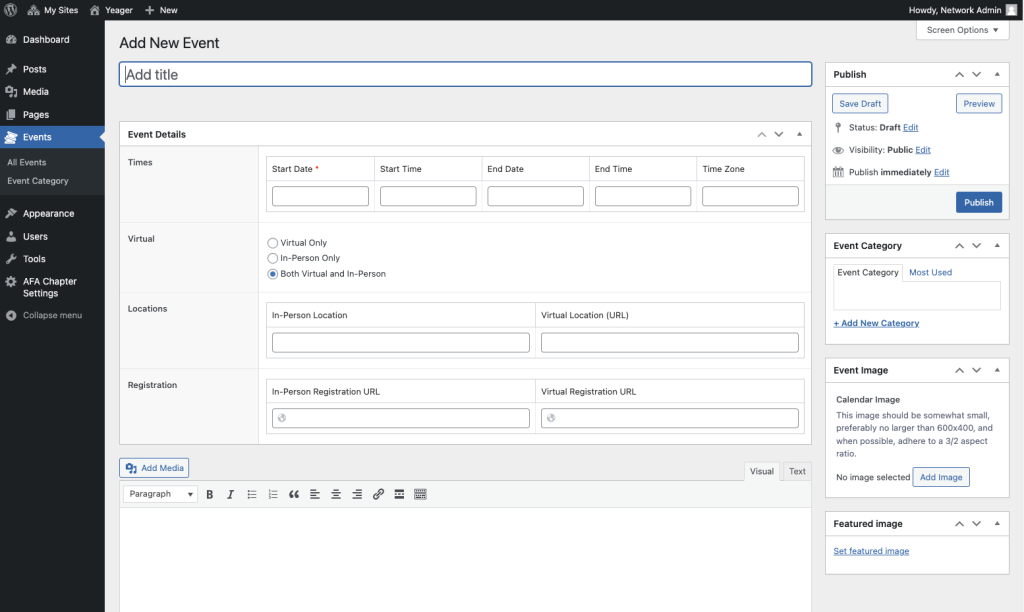
Adding a new Event is mostly a matter of filling out the form with the appropriate info. We’ll go through the form fields from the top and explain what they are.
At the very top of the page is a place for you event title. Be succinct, but clear. You often won’t have a lot of control, as the name of the event is the name of the event, but remember that an overly long title could get truncated.
Event Details
In the Time section, you have fields for your Start and End Dates, and Times, as well as the Time Zone. For single day events, ignore the End Date. The only required element within this section is the Start Date, all events must include a Start Date.
The next section allows you to indicate if this event is In-Person, Virtual, or Both. Virtual events are online events, such as a Zoom call or a webcast. An event such as a speech or awards ceremony that many will attend, but which is also being simultaneously webcast would be a case where you would select Both Virtual and In-Person.
The Locations section allows you to add a simple location. For In-Person events, you may wish to put an address, or the name of the venue. If you would like to add a more descriptive location for in-person events, you can do that in the full event description which we’ll get to later. For virtual events, the “location” should be a URL.
In the Registration section you will enter the URLs that allow potential attendees to register to attend your event. If you have a single registration URL that handles both In-Person and Virtual event registration, use the In-Person Registration URL field.
Event Description
The large field beneath the Event Details box allows you to enter all of the additional information that your attendees might need to know about the event, as well as any text that might help them decide if they want to attend! You’ll want to describe your event, give specific scheduling information, discuss who will be speaking, list any registration fees, possibly a menu if food will be served, and directions or more specific location information. This is where you get to be creative and talk up the event to your potential attendees.
You can also add images and logos to this section, but before you do that you will want to make sure you’ve set aside an image or two to use for the event’s Featured Image and Event Image, more about those below.
Event Images
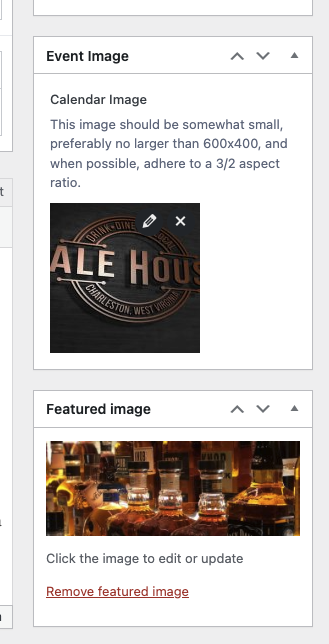
There are two images that are used within the context of an event. The first is the “Featured Image”, and this appears at the top of the single Event page in a similar way to how Featured Images appear on Posts and Pages. This image should be relatively high resolution, between 1200 and 1800 pixels in width, and appears best when it is relatively short and wide. If this image is not included, it is simply not displayed at the top of the page.
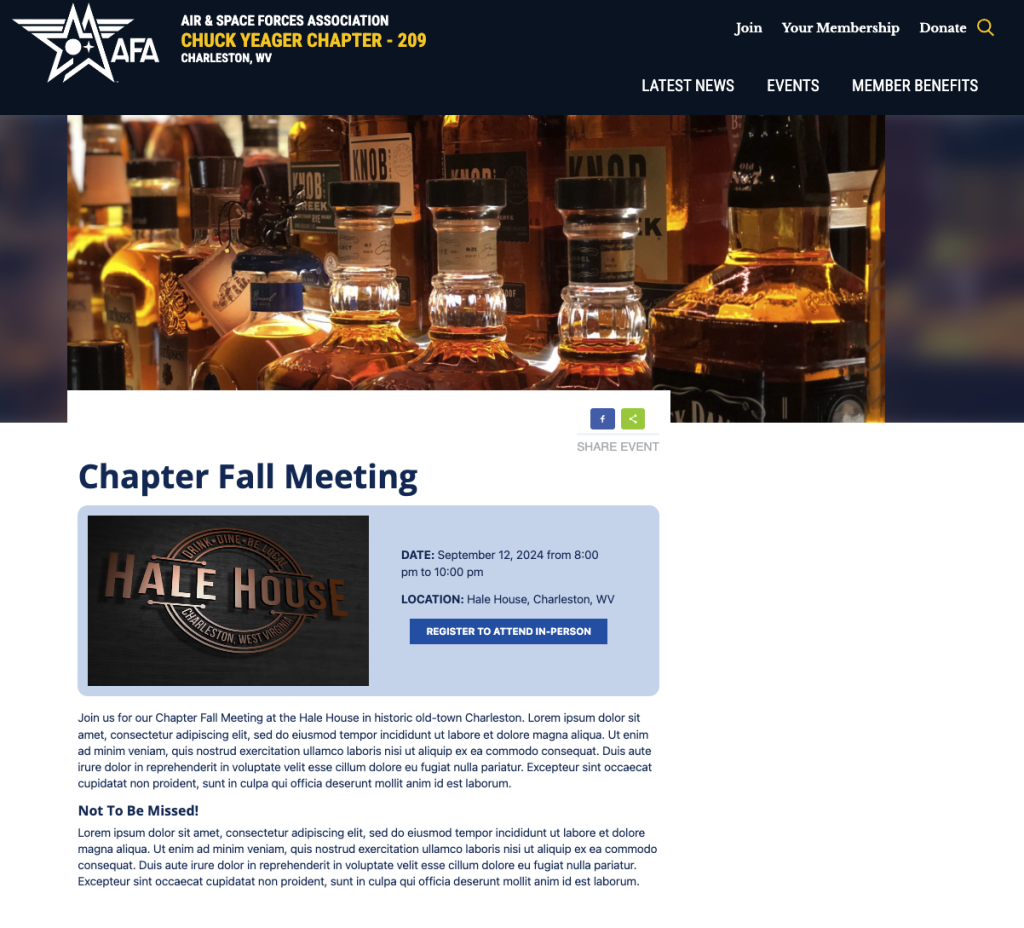
The second image, the “Event Image” and on the single Event page it appears within the blue box as shown in the example below. However, this is also the image that is used on both your site’s Events Calendar and Home Page. As described on the Event editing page, it doesn’t need to be very big, and it should be close to a 3/2 aspect ratio; 600×400 is a great size for this image. If this image is missing, the Fallback Event Image from AFA Chapter Settings > Website Settings is used in its place.
If you have no way to do simple editing of your images, cropping for example, remember that WordPress has some built-in image editing tools that are quite simple to use. Thes tools allow you to resize or crop your images to work better within the context of the site.
Here’s an example of how both images might appear on the single Event page.
Here are examples of how a chapter event will appear on the homepage, displayed chronologically alongside national events, as well as how it appears in the local chapter events calendar.